Create powerful titles using video masking
Take titles to the next level by creating a text mask using video masking tools
Text and video have historically shared a significant relationship. Text can be used in opening titles to introduce a video, to indicate the end of a video, and at any point to communicate information to the audience. Text can be added to indicate a change in location, introduce characters, and more!
All information being conveyed to your audience through text is important, and the visual style of the text you add to a video project can indicate your personal style as a video editor, or add to the overall theme of your production. Text masks offers unique creative possibilities that can add depth, context and interest to the text in your next video project.
What is text masking?
Typical titles have a static, solid fill and are created to sit on top of your footage. Text masks allow you to play footage within the outline of your text.
Text masks are a type of video mask. Regular video shape masks and panel masks can be created with basic brushes and shapes. Text masks use your input text to create the mask shape. In Pinnacle Studio, you can create a shape text mask that alters or interacts with an existing clip in your project, or create a panel text mask that sits on top of the clips in your project and add completely new footage to play inside your mask.
How are shape masks and panel masks different when applied to text?
Shape masks let you apply functions and filters to the masked area, and remaining area of a clip. Using text to create a shape mask means the text will alter the content of the clip you are masking.
Panel masks let you choose an asset to add to your project, and will sit on top of the clip you choose to mask on the timeline. You can apply 3D motion to panel masks! Using text to create a panel mask means that you need to add media to display through your text mask, and it will not affect the content of the clip beneath.
In summary:

Shape text masks
display content from the clip they are masking, directly altering the clip

Panel text masks
display new content, sit on top of existing footage, and can have 3D motion applied
Explore video masking, color grading, and more pro-caliber features with Pinnacle Studio
Masking text using a shape mask
First, let’s take a look at how we can create this powerful introduction title for a video project using the text shape masking tools in Pinnacle Studio. Shape masks are generally preferred when looking to create a text mask that displays or alters content from the clip beneath.
-
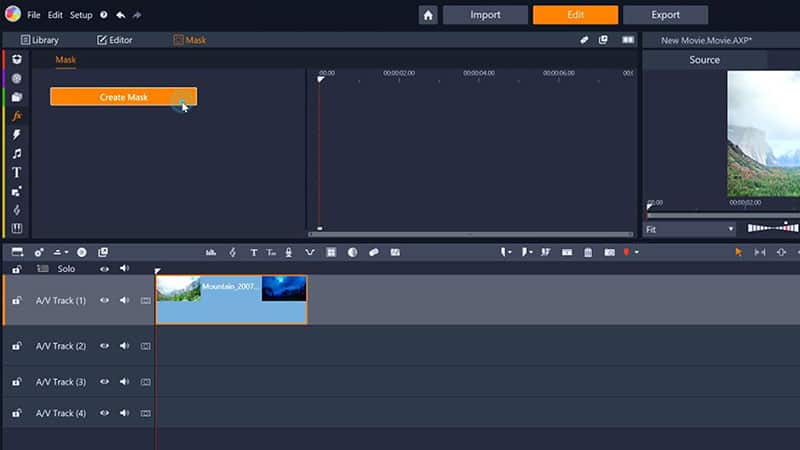
Open the mask creation window
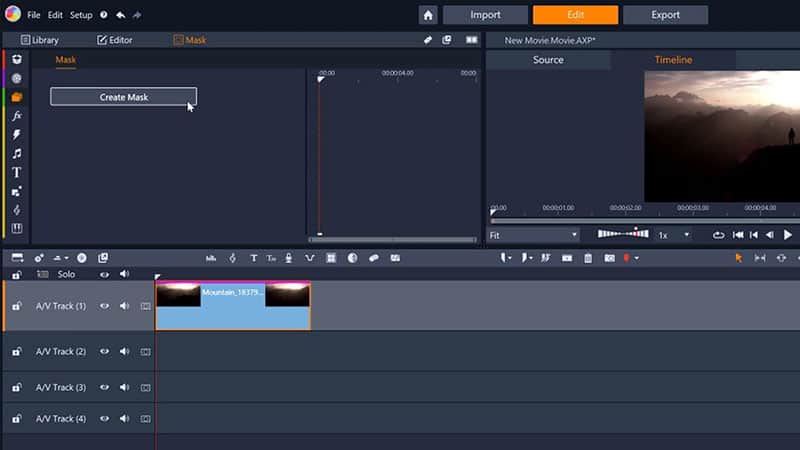
Select the clip that you want to have showing through your text mask, and click the Mask button on the editing toolbar. Next, click ‘Create Mask’ to open the mask creation window.
![Open the mask creation window]()
-
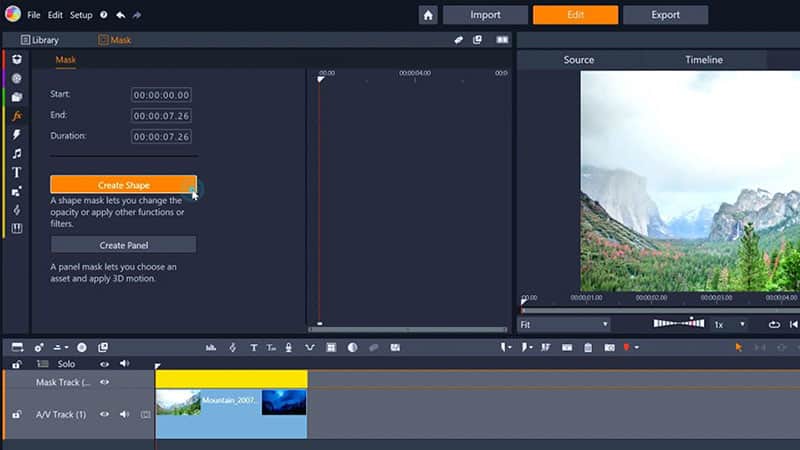
Choose mask type
Begin creating a shape text mask by clicking ‘Create Shape’.
![Choose mask type]()
-
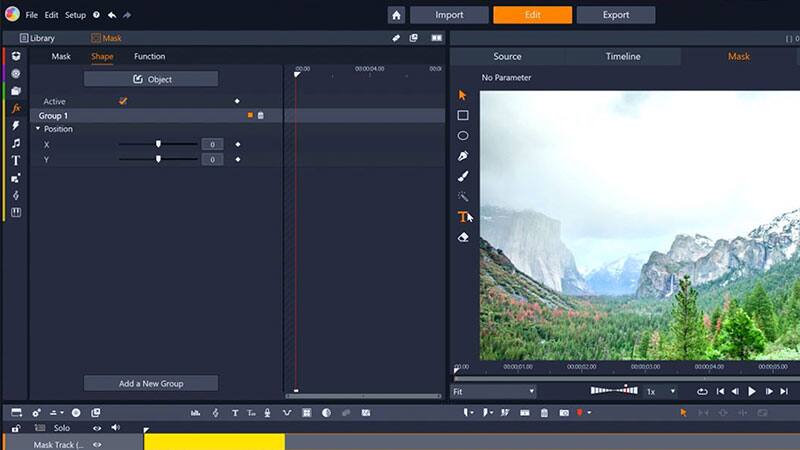
Select text mask tool
Select the text mask tool from the panel of tools that appears to the left of the preview window to create a text mask over your clip.
![Select text mask tool]()
-
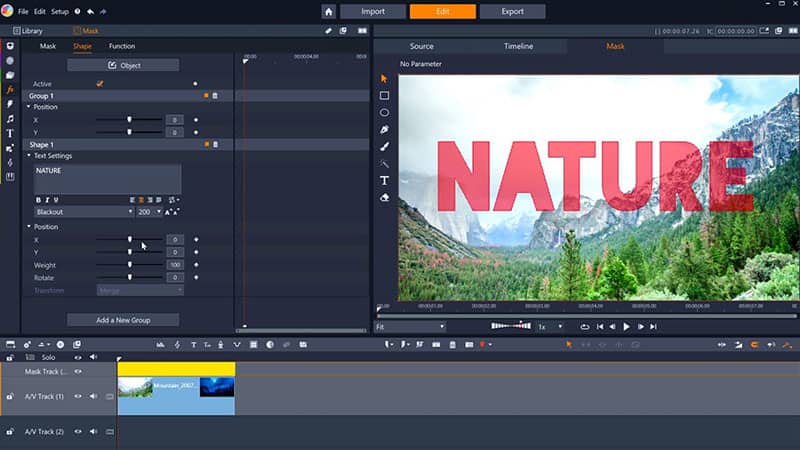
Customize your text mask
Use the settings in the mask creation window to adjust the text, font, size, and position of your text mask.
![Customize your text mask]()
Explore video masking, color grading, and more pro-caliber features with Pinnacle Studio
-
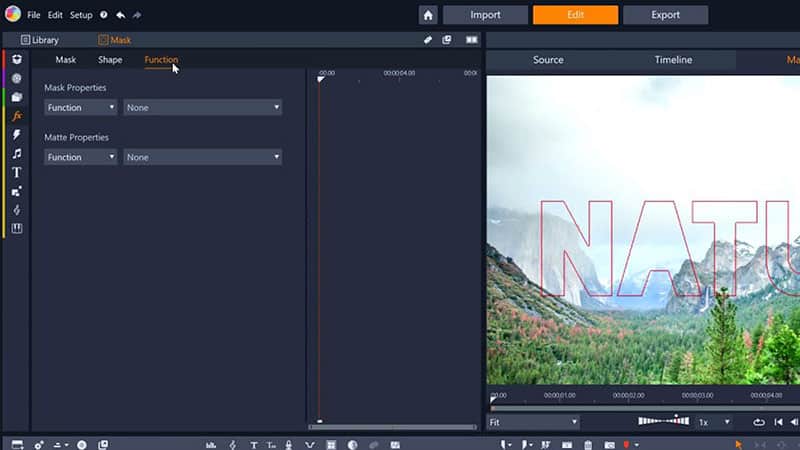
Open the Mask Function tab
Open the Function options for your mask by clicking on the ‘Function’ tab at the top of the mask creation window to view possible functions and filters you can assign to your text mask.
![Open the Mask Function tab]()
-
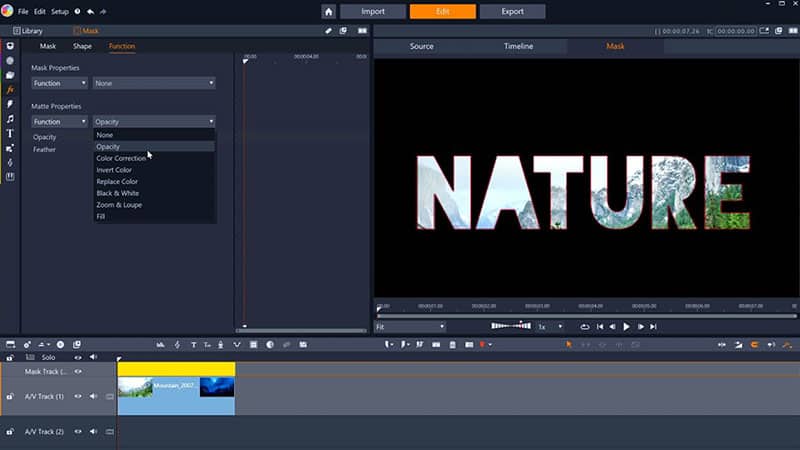
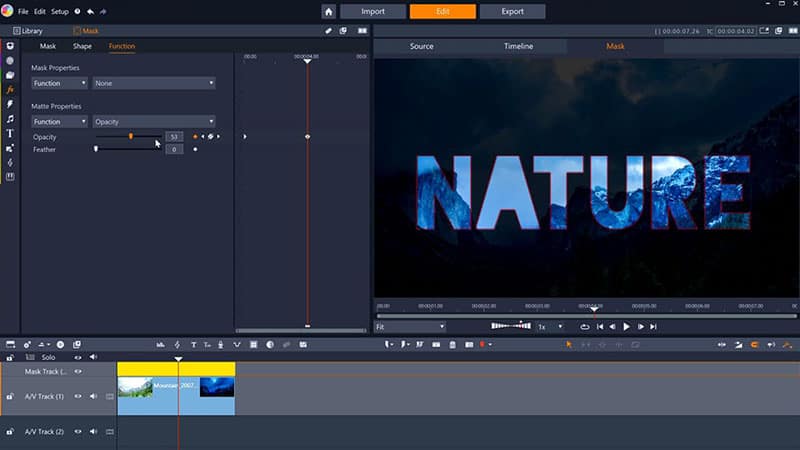
Assign a function to your text mask
Apply a function to your mask or the surrounding matte by selecting a preset from the dropdown menu. Once a function or filter is selected, customize it to your liking with the sliders below.
![Assign a function to your text mask]()
-
Keyframe your text mask (optional)
If you want your text mask to evolve over time, you’ll want to add motion to your mask using keyframes. Keyframe the motion of your mask by enabling keyframing in the options on the left, then scrubbing through the footage in the preview window and adjusting the size and position of your text mask over the duration of your clip until you’re happy with it.
![Keyframe your text mask]()
After completing these steps, we have created a text mask that looks like this!
Explore video masking, color grading, and more pro-caliber features with Pinnacle Studio
Masking text using a panel mask
Next, let’s take a look at how to create this unique 3D text using the text masking tools of a panel mask in Pinnacle Studio. Panel masks are generally preferred when you want to create a mask that sits on top of the footage beneath and displays unique content, or you intend to apply a 3D position or 3D motion to your text mask.
-
Open the mask creation window
Select the clip that you want to have showing through your text mask, and click the Mask button on the editing toolbar. Next, click ‘Create Mask’ to open the mask creation window.
![Open the mask creation window]()
-
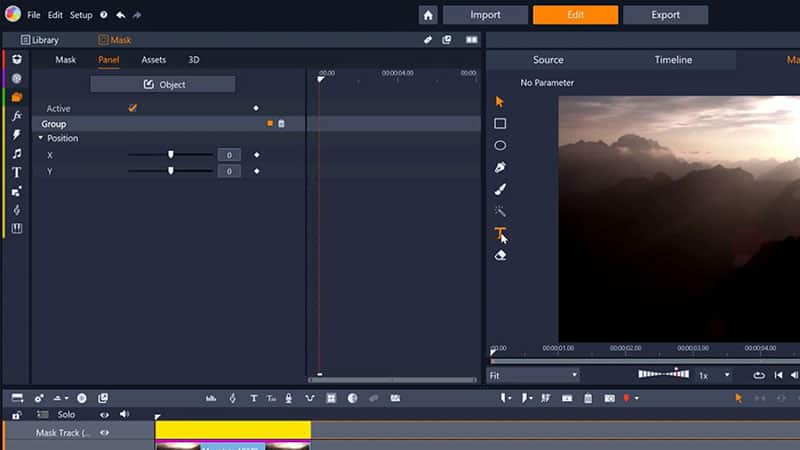
Choose mask type
Begin creating a panel text mask by clicking ‘Create Panel’.
![Choose mask type]()
-
Select text mask tool
Select the text mask tool from the panel of tools that appears to the left of the preview window to create a text mask panel.
![Select text mask tool]()
-
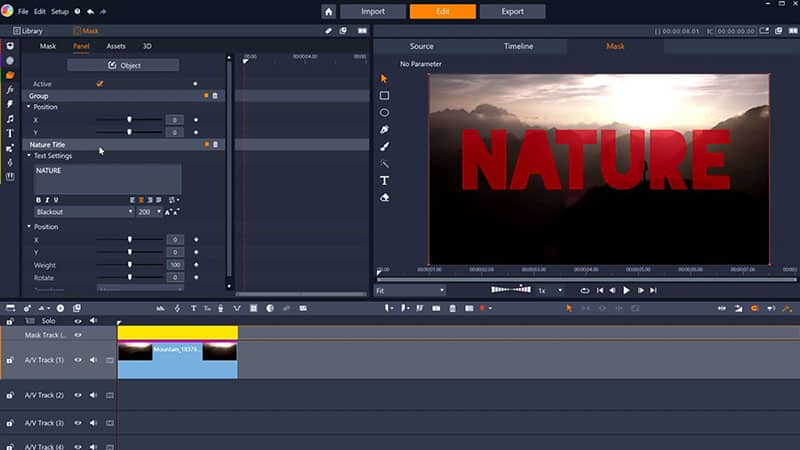
Customize your text mask
Use the settings in the panel mask creation window to adjust the text, font, size, and position of your text mask panel.
![Customize your text mask]()

Explore video masking, color grading, and more pro-caliber features with Pinnacle Studio
-
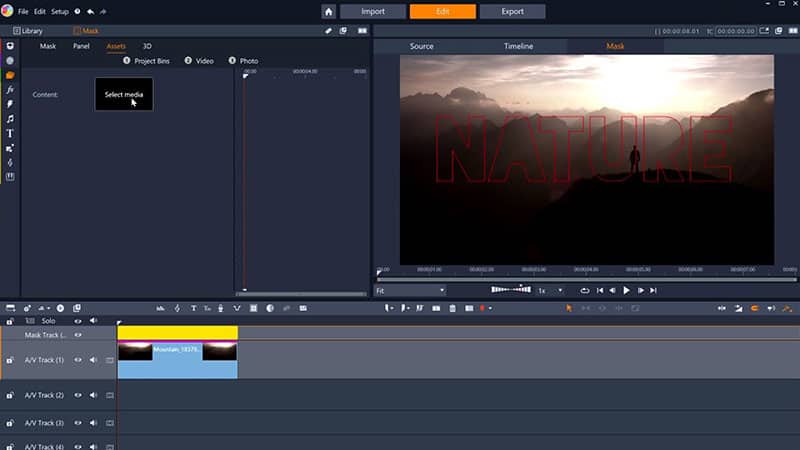
Add an asset to your text mask
Click on the ‘Asset’ tab of the mask creation window to open the media selection options. Click ‘Select media’ to browse your imported files for the photo or video you want to display through your text mask. Select the media you want to display, then click ‘Apply’ to add it to your panel text mask.
![Add an asset to your text mask]()
-
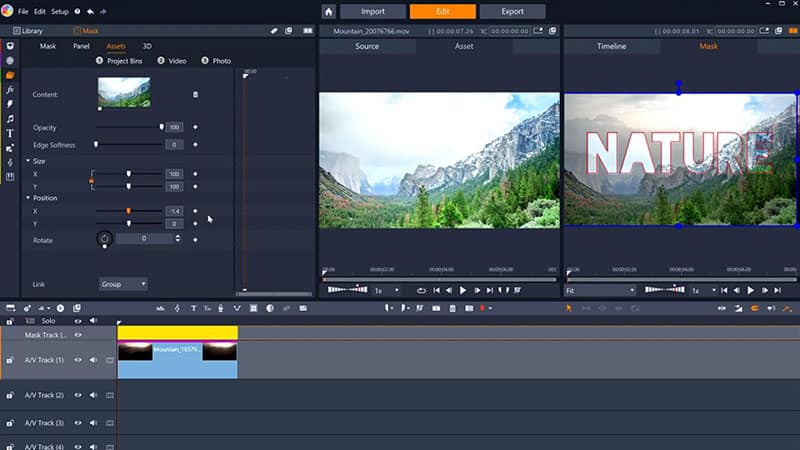
Adjust the asset
Using the sliders on the left hand side, or the resizing box in the preview window on the right hand side, adjust the size and position of the media you’ve added to your panel text mask to fit your liking.
![Adjust the asset]()
-
Adjust the 3D position of your text mask (optional)
Click on the ‘3D’ tab of the mask creation window to adjust the 3D position of your panel text mask.
![Adjust the 3D position of your text mask]()
-
Keyframe your text mask (optional)
If you want your text mask panel to evolve over time, you’ll want to add motion to your mask panel using keyframes. Keyframe the motion of your mask by enabling keyframing in the options on the left, then scrubbing through the footage in the preview window and adjusting the size and position of your mask panel over the duration of your clip. You can customize the size, position, and 3D motion of the text mask or asset being displayed using keyframes.
![Keyframe your text mask]()


After completing these steps, we have created a text mask that looks like this!