Hiding objects from view using video masking
Clean up footage and hiding distracting objects using a video mask panel
Distracting objects can interfere with the intended focus of your shot, pulling away the attention of your audience. Reduce the need to reshoot footage because an unplanned person walks through your scene or a prop is left in view by using a video masking to cover and replace the area where the distraction is occurring. Since video masking in Pinnacle Studio is fully keyframable, you can fine tune your video mask to keep that unwanted object hidden from your audience for the duration of your clip!
How to remove objects using video masking
Let’s take a look at how to create the illusion of an empty beach by hiding the family running across screen from view. It’s important to note that the size and complexity of your distracting object will determine how easy it will be to remove. For best results, ensure that there is another area within your shot that looks similar to the area you’re removing, as you will use that to hide the area where your distraction occurs.
-
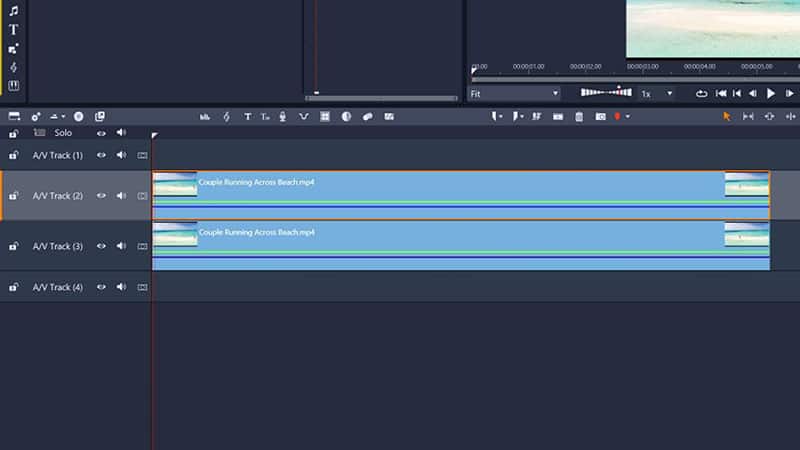
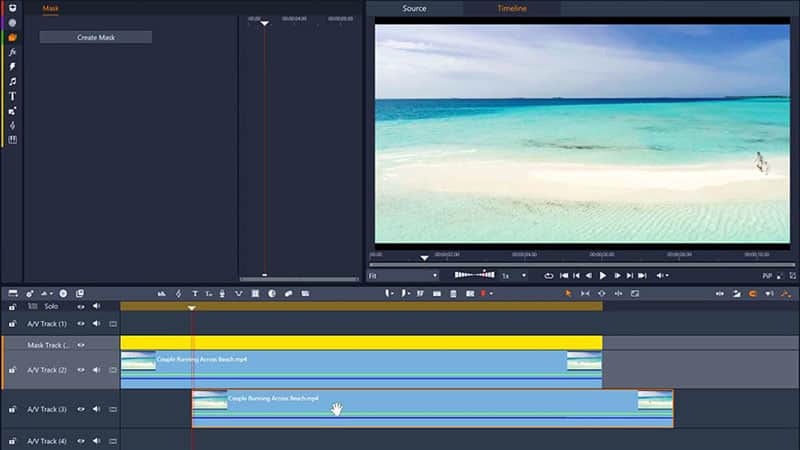
Duplicate your clip
Create a duplicate of the clip you intend to mask, and move it to the track beneath the original clip on the timeline.
![Duplicate your clip]()
-
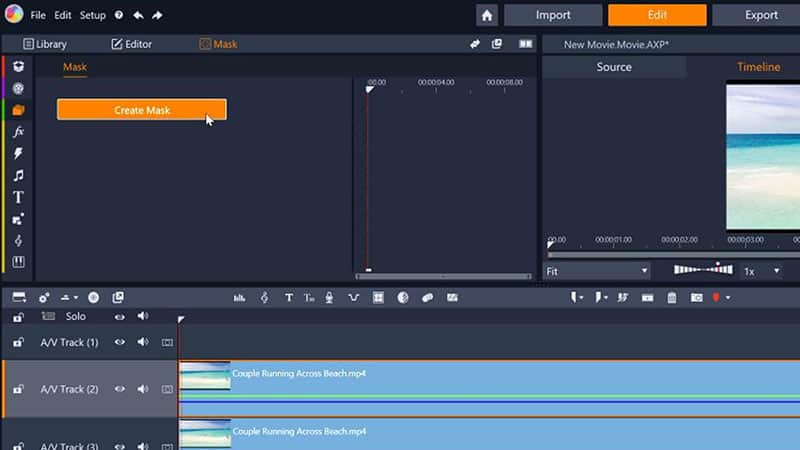
Open the mask creation window
Select original clip (the clip on the track above the new duplicate), then click the ‘Mask’ button on the editing toolbar. Next, click ‘Create Mask’ to open the mask creation window.
![Open the mask creation window]()
-
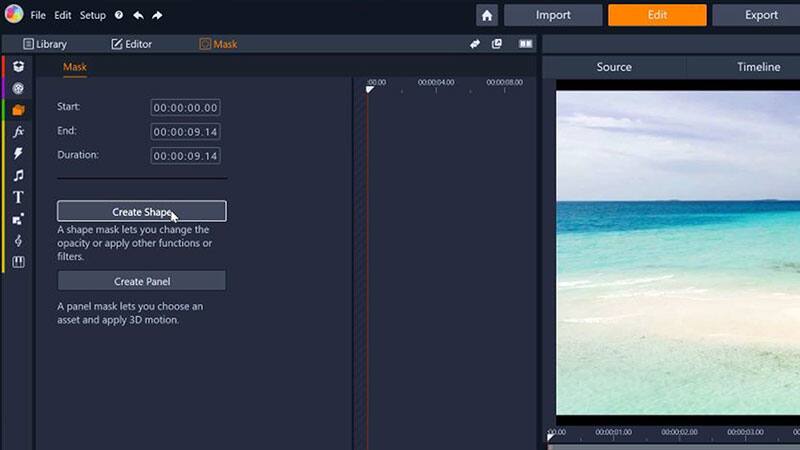
Choose mask type
Begin creating your video mask by clicking ‘Create Shape’.
![Choose mask type]()
-
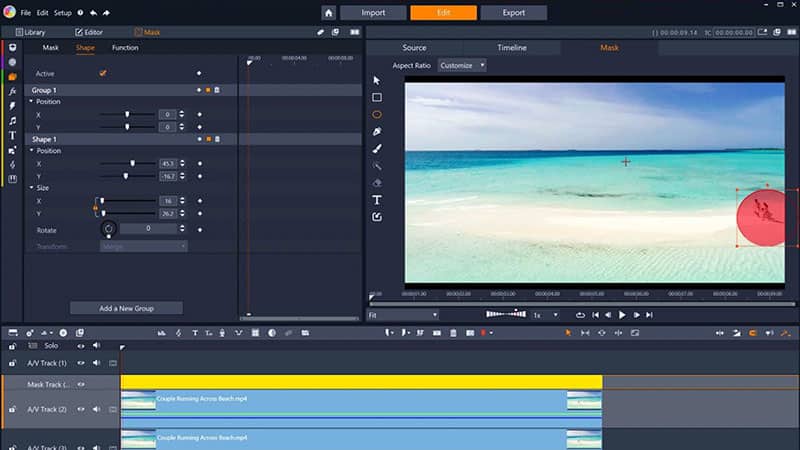
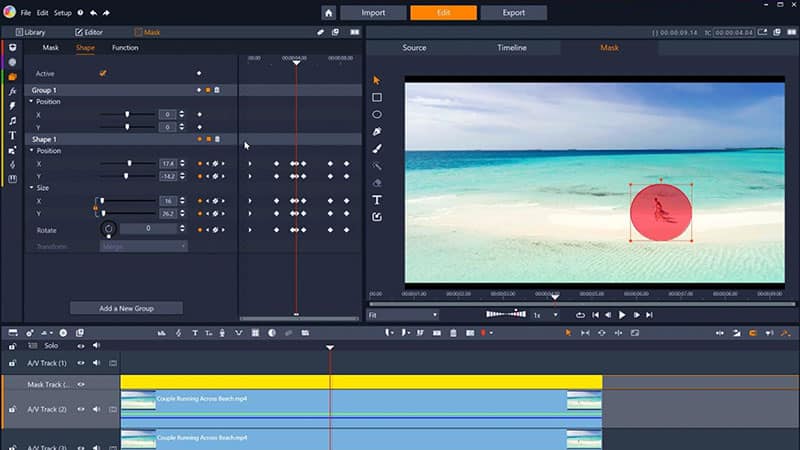
Create the mask
Use the masking tools on the left hand side of the preview window to mask the area you want to hide from view. You can also use the sliders in the mask creation window to adjust the size and position of your mask.
![Create the mask]()
Explore video masking, color grading, and more pro-caliber features with Pinnacle Studio
-
Keyframe your video mask (optional)
If your distracting object moves over time, you’ll want to add motion to your mask so that it follows your subject over the duration of the clip. Keyframe the motion of your mask by enabling keyframing in the options on the left, then scrubbing through the footage in the preview window and adjusting the size and position of your mask over the duration of your clip until you’re happy with it.
![Keyframe your video mask]()
-
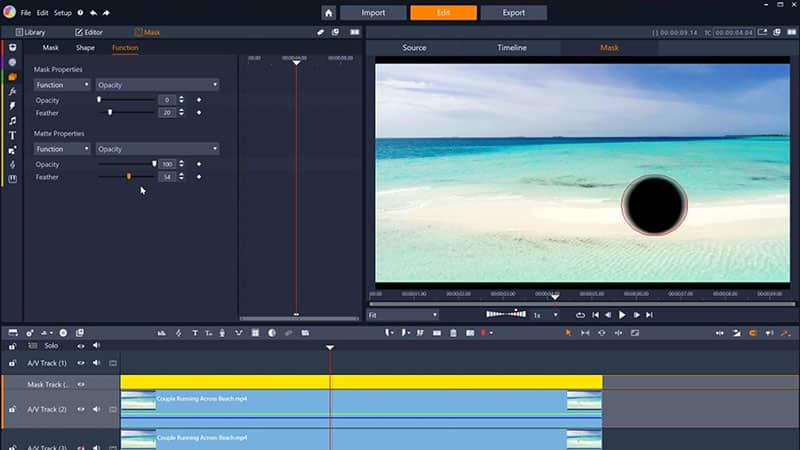
Apply ‘Opacity’ function
Click the ‘Function’ tab at the top of the mask creation window to view possible functions and filters you can assign to your mask and the surrounding matte. Select ‘Opacity’ from the dropdown list of preset functions, and set Opacity to zero using the controls that appear beneath. It’s recommended that you also apply the Opacity function to the matte surrounding your mask and set it to 100. You’ve now created a hole in your clip above the distracting object. The duplicated clip will be showing through, so it may appear that no changes have been made. You may want to hide the duplicate clip in the track beneath your masked clip on the timeline so you can make accurate adjustments to your mask.
You can smooth the inside edges of your mask to improve the blending around the area you’re hiding with your mask using the ‘Feather’ slider. Adjust the feathering for both the mask and matte areas to smooth the blending around the inside and outside edge of your mask until you’re happy with it.
![Apply ‘Opacity’ function]()
-
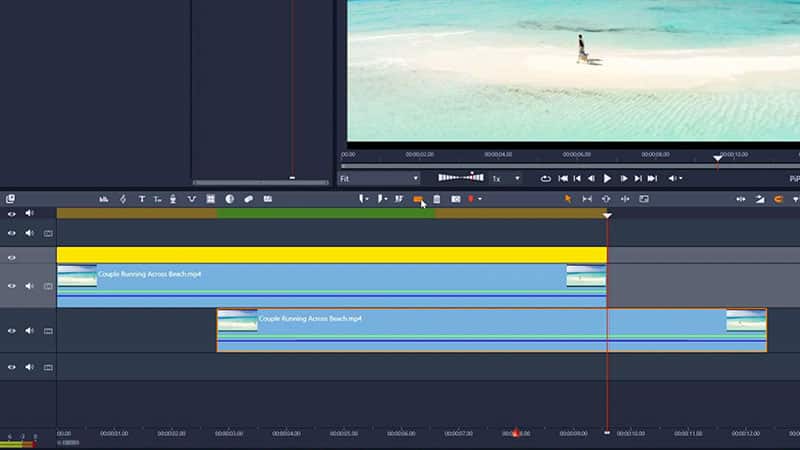
Adjust the duplicate clip
How you adjust the clip to fill the hole created by your video mask will depend on the size and motion of your object.
If the object you are hiding is stationary:
Double click on the duplicate clip from step one your timeline to open the clip properties, and adjust the position of the duplicate clip until the distracting object is hidden from view, replaced with a similar area from within your clip. You may need to add motion to the duplicate clip to ensure the area you want to have displayed through the hole you’ve created with your video mask stays visible.If the object you are hiding moves:
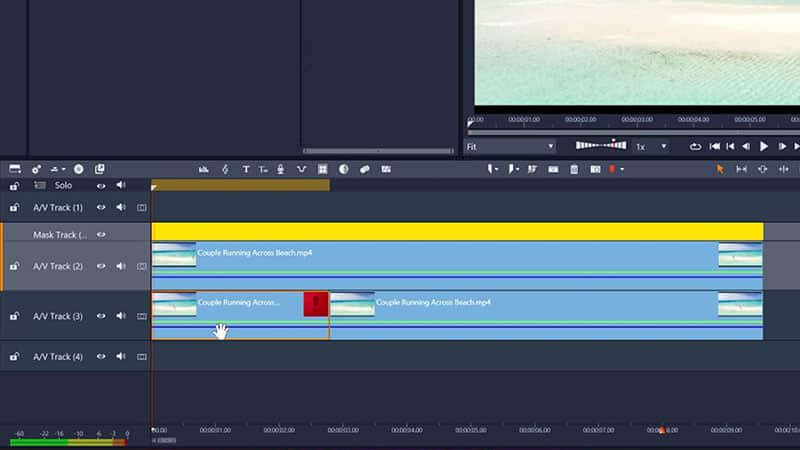
Adjust the start point of the duplicated clip on the track beneath until the object has moved far enough to disappear behind the mask.![Adjust the duplicate clip]()
Once you adjust the start point of your duplicated clip, you will have nothing showing through the beginning of your mask, so you’ll need to fill that gap in the timeline following these two steps:
Split your duplicate clip at the end point of the masked clip above.
![Adjust the duplicate clip]()
Next, drag the new split clip to fill the gap on the timeline created by your first adjustment. It should be exactly the right length!
![Adjust the duplicate clip]()
After completing these steps, you’ve successfully removed a distraction from your footage.
An almost identical process can be used to censor faces, license plates and other sensitive information from your footage.
Video Masking is a truly revolutionary tool that presents limitless creative possibilities. Take a look at how you can use a video mask to create powerful and unique titles to your project, or improve the quality of footage with creative effects and enhancements!