Color Grading: Color Wheel
Change the color of your video, all at once or individually across shadows, midtones and highlights
The Color Wheel color grading contains four color wheel controls that can be used to assign a new hue to areas of your video. The Color Shift wheel will shift the color scheme of your entire video towards the selected color. You can instead make adjustments individually across the Highlights, Midtones and Shadows within your footage directly using their color wheel controls. The slider to the left of each wheel controls the overall brightness of the respective tone within your footage.
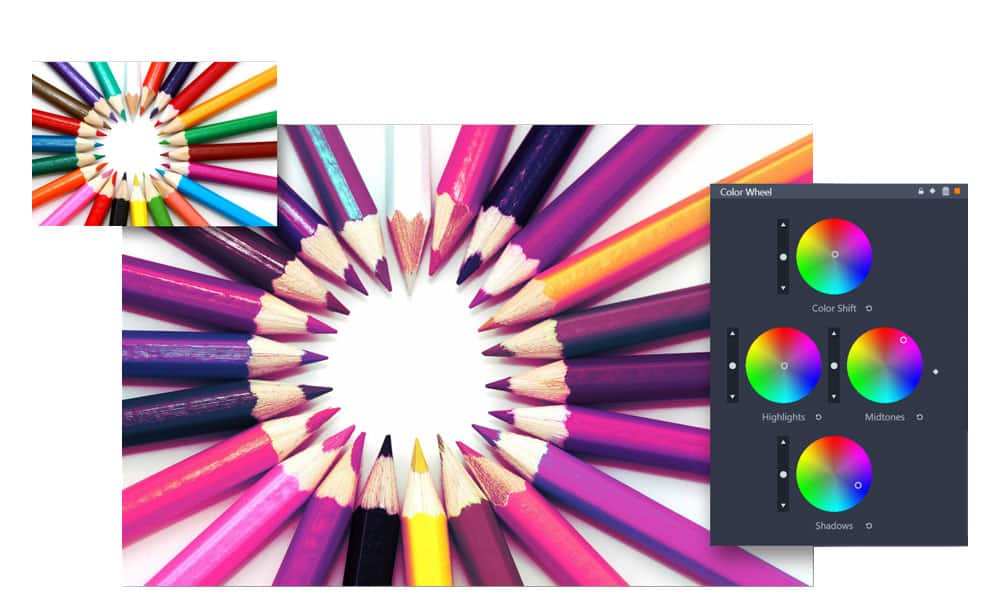
Highlights are the brightest part of an image, regardless of color. You can create an overexposed image by boosting the brightness of the Highlight color wheel, or make it warmer by making the highlights more red or yellow. Midtones are the tones in the middle range of brightness. Getting a strong balance of midtones is essential in color grading. We can alter the brightness of midtones to fix a clip with poor contrast. Adjusting the midtones too much can quickly create a wash over the whole clip, so keep that in mind! Shadows represent the darkest pixels in the clip, and give the image a lot of its flavour. Decreasing the brightness of the shadows will bring instant depth and contrast to your video! Shifting the color of your shadows towards red or blue is a quick way to warm up or cool down the tone in your video.
Explore video masking, color grading, and more pro-caliber features with Pinnacle Studio
How to use the Color Wheel controls
-
Open the color grading control panel
You can open the color grading controls for any clip by selecting clip, and then clicking ‘Editor’ on the timeline, or double clicking on the clip you’d like to make adjustments to, and select the ‘Color’ tab to open the color grading window. Ensure the ‘Color Wheel’ tab is selected to access the controls we’ll be using in the steps below.
-
Make desired adjustments
The adjustments you make to your clip will be determined by the effect that you’re looking to achieve. Keep to small adjustments if you want to avoid creating a wash over your video. Spread adjustments across all four color wheels for the most realistic alterations. Simply click anywhere on the color wheel to activate it, then click or drag the mouse to shift the color in your video towards the one you’ve selected.
-
Keyframe your changes (optional)
Keyframing your color grading adjustments is not always necessary, but may help to ensure consistency through any natural variations in lighting and scenery that occur over the duration of your footage. Enable keyframing by clicking on the diamond beside the tone curve display, and add keyframes to fine tune the timing and strength of your adjustments over the duration of your clip.