Color Grading: Basic Controls
Adjust temperature, white balance, tone, saturation, and more clip attributes
The ‘Basic’ panel is the first of four color grading control panels offered in Pinnacle Studio. The ‘Basic’ color grading control panel allows you to manipulate the white balance, tone, and basic settings for your footage.
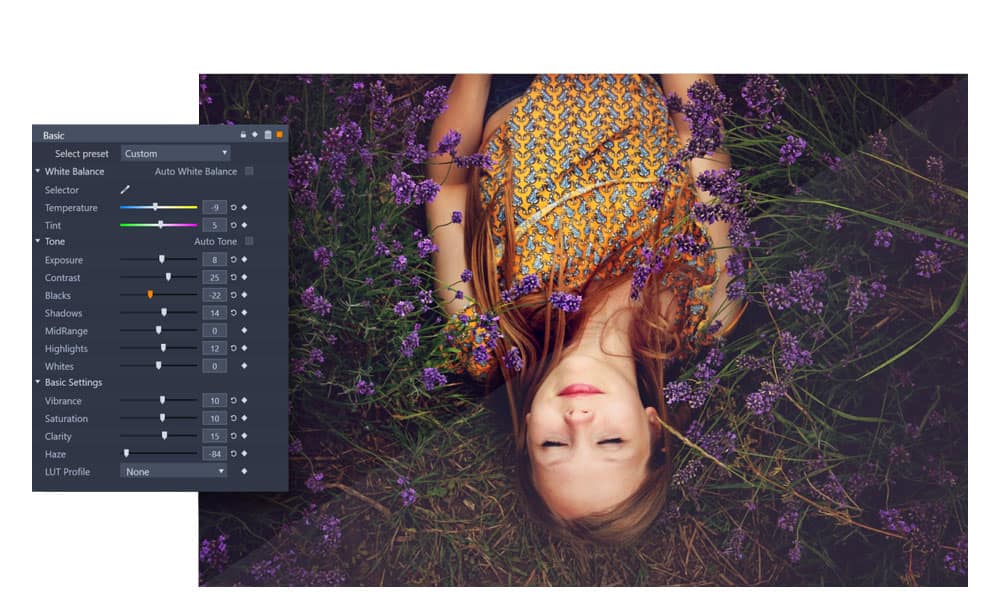
The White Balance controls are useful to color correct footage taken in different light or weather conditions. The white balance in your video clip can be adjusted automatically by clicking ‘Auto White Balance’, and adjusted by selecting something white within your footage using the eyedropper tool. The sliders for Temperature and Tint can also be adjusted manually for precise adjustments.
The Tone controls are useful when adding depth and improving clarity in your footage. Manipulate the levels for ‘Exposure’ and ‘Contrast’ to apply changes to the clip in its entirety, or use the more focused sliders to adjust shadows, highlights, and whites independently. Focusing changes in this way will allow you to correct the tone in specific areas without over or under exposing the remainder of your footage.
The Basic Settings controls are a quick way to enhance the overall color, clarity, and haze in your video. These settings are often used in combination with the Tone and White Balance controls. A dropdown selection of LUT profiles is also available under these settings, which can be used to alter the tone of your footage instantly. Learn more about using LUT profiles to alter the mood in your footage here.
You can use basic color grading controls to make color corrections, adjust the white balance, and even improve the clarity of your video! All color grading controls are fully keyframable, so you can set up your adjustments to evolve as your clip progresses. These basic color grading controls make it possible to brighten dark areas within your footage without overexposing your subject, change the mood of a scene by manipulating the temperature of the light, and so much more! Adjusting the white balance and tone using these basic controls can make a huge difference in the quality of your footage.
Explore video masking, color grading, and more pro-caliber features with Pinnacle Studio
How to use the Basic color grading controls
-
Open the color grading control panel
You can open the color grading controls for any clip by selecting clip, and then clicking ‘Editor’ on the timeline, or double clicking on the clip you’d like to make adjustments to, and select the ‘Color’ tab to open the color grading window. Ensure the ‘Basic’ tab is selected to access the controls we’ll be using in the steps below.
-
Make desired adjustments
The adjustments you make to your clip will be determined by the effect that you’re looking to achieve. Adjust the white balance, tone, and/or basic settings sliders until you’re happy with the results.
-
Keyframe your changes (optional)
Keyframing your color grading adjustments is not always necessary, but may help to ensure consistency through any natural variations in lighting and scenery that occur over the duration of your footage. Enable keyframing by clicking on the diamond beside the tone curve display, and add keyframes to fine tune the timing and strength of your adjustments over the duration of your clip.