Your Complete Guide to Drone Operation and Video Editing
Video Editing Tips and Tricks
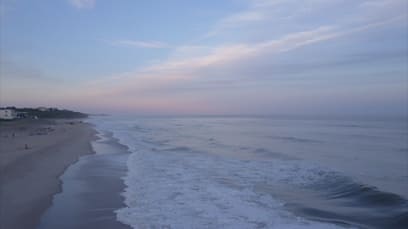
It’s no doubt that aerial shots and video offer a fresh perspective and approach to content production. With drones now shooting in 4K video and above, cinematic footage of breathtaking views can now be at your fingertips.
There are a few steps to achieving masterful work from a birds-eye-view. However, the process need not be daunting. Today, there are innumerable techniques from drone operation, settings, and editing in post-production that can help you soar.
In this article we’ll cover just that. We’ll have a brief look at the latest and greatest drone-cameras available on the market and how to use them. We’ll survey some best practices and settings for getting optimal content straight from your camera. Then we’ll talk about common editing techniques applicable to just about any software, to really make your drone footage stand out. The goal is to do away with feelings of trepidation around getting into drone filming/editing and boost your confidence and excitement for exploring this ever-expanding field of content curation.
Learn more about Pinnacle Studio Ultimate
Finding The Drone That’s Right For You
Let’s talk drones. There are many types to choose from. Newer models are easier to fly and offer many smart features. Usability has never been so optimal; it’s the perfect time to get into droning. The DJI Mavic line offers many sizes and features. They will likely have exactly what you need. Most notable, for a commercial entry level drone, is their Mavic 2 Zoom. It’s the latest model and offers an array of superb functionality.
Here are some features to look for in your drone. Of course, you’ll want the latest and greatest effects. We’ve got you covered.
- Hyperlapse: With Hyperlapse, the aircraft shoots stable aerial footage and processes it automatically, enabling you to create professional-looking time lapses with the touch of a button. This goes a long way in shortening your efforts in post production.
- Dolly Zoom: Dolly Zoom is a new QuickShot for the Mavic 2 Zoom, offering an otherworldly perspective in a fully-integrated drone. Dolly Zoom automatically adjusts focus when flying, adding an intense, warping visual effect to your video. When flying manually, you can also set focus speed values for even more creative options.
- Active Tracker: This smart feature enables you to highlight a subject in your frame, which is then automatically followed while you shoot. This helps you to focus on other creative camera movements without having to worry about keeping your subject centered. Technically speaking, this smart feature also enables the drone operator to highlight themselves as a subject, put the controller down, and get some really cool DIY footage!
- Tripod Mode: Tripod mode maximizes stability of your aerial footage. When first starting out, it can be a good idea to fly your drone in tripod mode. It will slow the speed of your flying to minimize the chance of any collisions. In addition, restricting the speed of your drone almost guarantees smooth cinematic shots, and avoids capturing unusable shots loaded with jolts.
Flying Tips
Okay, here are a few things to keep in mind. Regardless of model or brand, your drone will come with a remote control and, most likely, additional batteries. Know the battery life of your particular device as this directly relates to your flight time. If you plan on going out and shooting all day with no way to recharge, you may want to consider picking up a few extra batteries. Many controllers link right to your smart device or tablet, which enables you to see the footage you’re capturing in real time. It’s great to see what you’re capturing as you fly. Not to mention, much safer. Still, even with this ability, you should always attempt to keep the drone in line-of-sight as you fly. Depending on the tilt of the gimbal (directional and angular mechanism of your drone camera) some tall objects such as trees and buildings may be left unseen. Drones can now fly up to 4 miles away. You wouldn’t want to crash your drone only to have to look for it within a 4-mile radius!
When deciding which drone is for you, you’ll want to have an idea of what sort of projects you’d like to work on. Will you be shooting landscapes, or people? In cities or the countryside? How important is the definition quality of your drone; will it fulfill professional orders or will you use it primarily as a hobbyist? What is your budget? The answers to these questions should fuel your research process. Drone flying, film-capture, and workflow can vary from person to person and you’ll want to spend some time thinking about what technology and features will best suit your particular needs.
After you’ve settled on the drone for you, you’ll want to make sure you know how to safely operate it. Luckily, most commercial drones for filming operate largely in the same manner. You can get a good enough idea of whether or not your drone of choice is well documented on a platform like YouTube. This way you can dig your heels deep into research right from the start. Also, don’t forget that many drone companies offer tutorials specific to their product lines. The point is, you have to get to know your drone well. I’ll touch on some of the basics of first getting your drone in the air and how to optimize its operation.
Learn more about Pinnacle Studio Ultimate
Getting Ready For Takeoff
Calibration
Calibration is one of the very first steps to taking your drone up safely. Many drones will have a smart-flight feature that can bring your drone back home to you should you lose it from your line of sight. Some drones will come back home automatically once the battery is sufficiently low enough, by way of their smart battery function. However, these functionalities won’t work if you don’t first set your ‘home’ location. Calibration is an easy enough process and takes 15 seconds; make sure to do it, it could save your drone!
Settings
In most cases, ensure your GPS is turned on when flying outside. This is how many drones make their way around. It also enables you to track their flight paths, superimposed over a map.
Automatic settings will be your best friend in the beginning. Make sure to get into the habit of setting your white balance each time you fly. If you want to manually set your ISO and shutter speed, here’s something to keep in mind:
Exposure
ISO and shutter speed come together to set your exposure. Your ISO value is the measure of light sensitivity of your drone camera. In bright, well lit environments, an ISO setting of 200 or under should be sufficient. Low lit conditions will require a higher ISO as to enable the camera to become more sensitive to the light that is present.
Your shutter speed is exactly what it sounds like. The relative speed of your shutter determines how much light is captured in the image as it relates to time. The higher the shutter speed, the less time the camera has to capture the image. This is the direction you’ll want to go if you’re interested in freeze-capture high action, fast movement. The lower the shutter speed, the more of the action will be captured in the image. High action movement might take on a blur effect in this case. How you choose to set it will depend on the look you’re going for.
Editing your Drone Footage
Programs like Pinnacle Studio have a feature called Smart Proxy editing, which makes working with 4K footage much smoother. Smart Proxy creates lower resolution working copies of larger source files to work and edit your project with, but when you render your video project, the original, high-quality video source files are used. This speeds up your editing process and relieves the headache of working with large file sizes.
Making Quick Edits
Once you’ve shot your footage, simply import that footage into your editor of choice and begin your editing. You can make some quick edits to really make the footage you capture tell a story. Adding emotion to your story may be as simple as finding the perfect soundtrack to accompany your film. Trim video, cut out the parts you don’t need, and make quick cut transitions to the next scene to show your viewers another angle. Then, add titles to introduce your video or to label locations as you fly around.
Color Correction
As a general rule of thumb, you want to treat your exposure and saturation levels as you shoot your footage as best you can. Leave only fine adjustments to be done in post-production editing. Saturation makes your image a lot warmer. Don’t get too overzealous here. Artificially brilliant colors are great and can add an artistic flare to your image but you want to make sure that you’re staying as close to a true representation of your image or video as possible. This is especially the case when shooting for commercial purposes.
Color Grading
In post production we can look to use pro-tools like Color Grading to really set the tone and mood of the footage for a rich result. Color is so important because, like lighting, it affects the mood and feeling of your clip. Here you can add a final touch to the image to get an optimally balanced look. When adjusting color, generally aim to balance the levels of Red, Blue, and Yellow. These primary colors should be your primary focus.
Historically, Color Grading controls have only been available in professional level video editors until recently. We are beginning to see Color Grading in consumer level video editors like Pinnacle Studio and Corel VideoStudio. This enables you to quickly make some powerful color adjustments, apply LUT profiles to your footage, and save presets to make quick adjustments across all of your clips.
Learn more about Pinnacle Studio Ultimate
Popular Video Effects
The video effects you can add to your videos are endless. Play around with whatever effects are available in your software suite of choice. Likely, there will be many. Some you will really like and others not so much. Adding effects can be as simple as dragging and dropping an effect onto your clip.
Here are some popular video editing effects you can consider adding to your drone footage:
- Seamless transitions: Add energy to your cuts and create a smooth transition from one scene to another. Zoom in on the blue sky, then rotate and zoom out of the next scene. Flip, zoom, spin, or whip between scenes with Seamless Transitions that add excitement to your cuts. Just align similar colors or objects to create a smooth and artful transition between imagery. Quick cuts from one angle to the other are also very effective with landscape scenes. Play around with transitions and see what fits your clip the best. Watch video
- Pan and Zooms: Often when filming your drone video, you apply techniques like Dolly Zoom or Hyperlapse – but sometimes it’s effective to exaggerate these effects in a video editor post production. Use tools like Pan and Zoom to move your footage around. Or, apply a Motion Blur to your clip to add realistic motion blur onto your footage when the scaling occurs. This provides a more natural zoom look on the final shot.
- Video Corrections: Stabilize shaky video footage in post-production with video stabilization controls to remove any jitters or bumps in the filming. Or, easily remove lens distortion from wide angled cameras (better known as the fisheye effect). Quickly straighten lines that appear to be curved or angled and even straighten the horizon. Make footage feel fluid with the rest of your film and correct lens distortions from wide angle cameras.
- Text: Adding text to your footage is easier than ever and is perfect for videos requiring a direct message. Give life to your text by animating or altering with parallax effects. When adding text to you clips, make sure that whatever movement you add complements the movement of your drone shot.
Setting the Tone with Music
Adding music to your work is often overlooked. Don’t make this mistake! The dual function of visually stunning content and emotionally moving musical pieces draws your viewers in and will make them want to keep coming back for more. Perhaps you can find local up and coming artists that would be willing to feature their music in your work. This is a great way to collaborate with other creators and cross promote.
Note: It’s always a nice touch if you are meticulous about your cuts in post production. Before adding any transition effects, consider making cuts from one clip to the next as sharp and as in-line with the movement of the music as possible. This makes for easier processing for your viewers’ brains, thereby resulting in a more enjoyable experience of your content.
Below you can find a sample music video. Notice the flow of each clip as it matches precisely with the movement of the music. Generally, if you move to your next clip on the stronger, more even beats, you can’t go wrong.
Considering Pinnacle Studio to edit your aerial footage? Here’s is a quick tutorial on getting started in Pinnacle Studio so you can get a feel for it.
Learn more about Pinnacle Studio Ultimate
File Size and Data Management
The size of your video files and how you manage them is perhaps the most overlooked feature of managing your drone content--especially if you’re shooting in 4K! Expect to have videos of many gigabytes in size, because an afternoon shoot can easily take you over 20-50GB. Having a post-shot production workflow is vital if you’ll be shooting a lot. If you’re shooting for commercial purposes, it’s even more necessary that you have a system in place to keep you organized. Know how you’ll name your files; by date, by location, etc. Having a separate folder for each type of content can also prove invaluable. External hard drives grow cheaper and cheaper with more and more capacity. Having an external hard drive will save space on your computer, freeing up processing power and avoiding the uncomfortable situation where you run out of space and can’t proceed with a particular project you’re excited about.
Why use Pinnacle Studio to edit your drone footage?
There is an increasing number of video editors coming to market. Deciding which one to select is a daunting task. Pinnacle Studio continues to be a leader in the prosumer market with powerful and precise editing options.
Pinnacle Studio is for experienced video editors, who want the power and flexibility of an advanced, professional video editor, but at an affordable cost. Edit your video with keyframes and control practically every parameter with precision. Pinnacle Studio is a great choice for video editors who want to enjoy the perks as a professional editor at a consumer editor price!
Pinnacle Studio is the video editor that offers you both quick edits and powerful pro-like features including Color Grading, LUT profiles, precise keyframing controls, and so much more! With 2,000+ effects including pro-caliber effects from industry leader NewBlueFX and incredible tools like multi-camera editing, motion tracking, and 360 video editing, unlimited creativity is at your fingertips.
Pinnacle Studio provides you with the power, creativity, and control you need to edit like a professional, with the flexibility to customize your workspace and edit your way. To Learn more about Pinnacle Studio, www.pinnaclesys.com.
Learn more about Pinnacle Studio Ultimate
And Beyond…
Remember everything gets better with practice and drone operation and post production is no exception! Keep at it and have fun. Jump right in, you’ll find your aerial way! Promise.